
EC Cube
Enable Smartpay on your EC-Cube webshop with our simple 5 min integration!
次の手順を開始する前に、EC-Cube v4コードベースが機能していることを確認し、公式ドキュメントで提供されているすべての要件を満たしていることを確認してください。
インストール
- Download the plugin zip file.
- Open your EC-Cube admin page
- Navigate to
オーナーズストア > プラグイン > プラグイン一覧 - Upload the zip file under
ユーザー独自プラグイン - After successfully uploading the zip file, click ▶ (有効化) to activate Smartpay.
構成
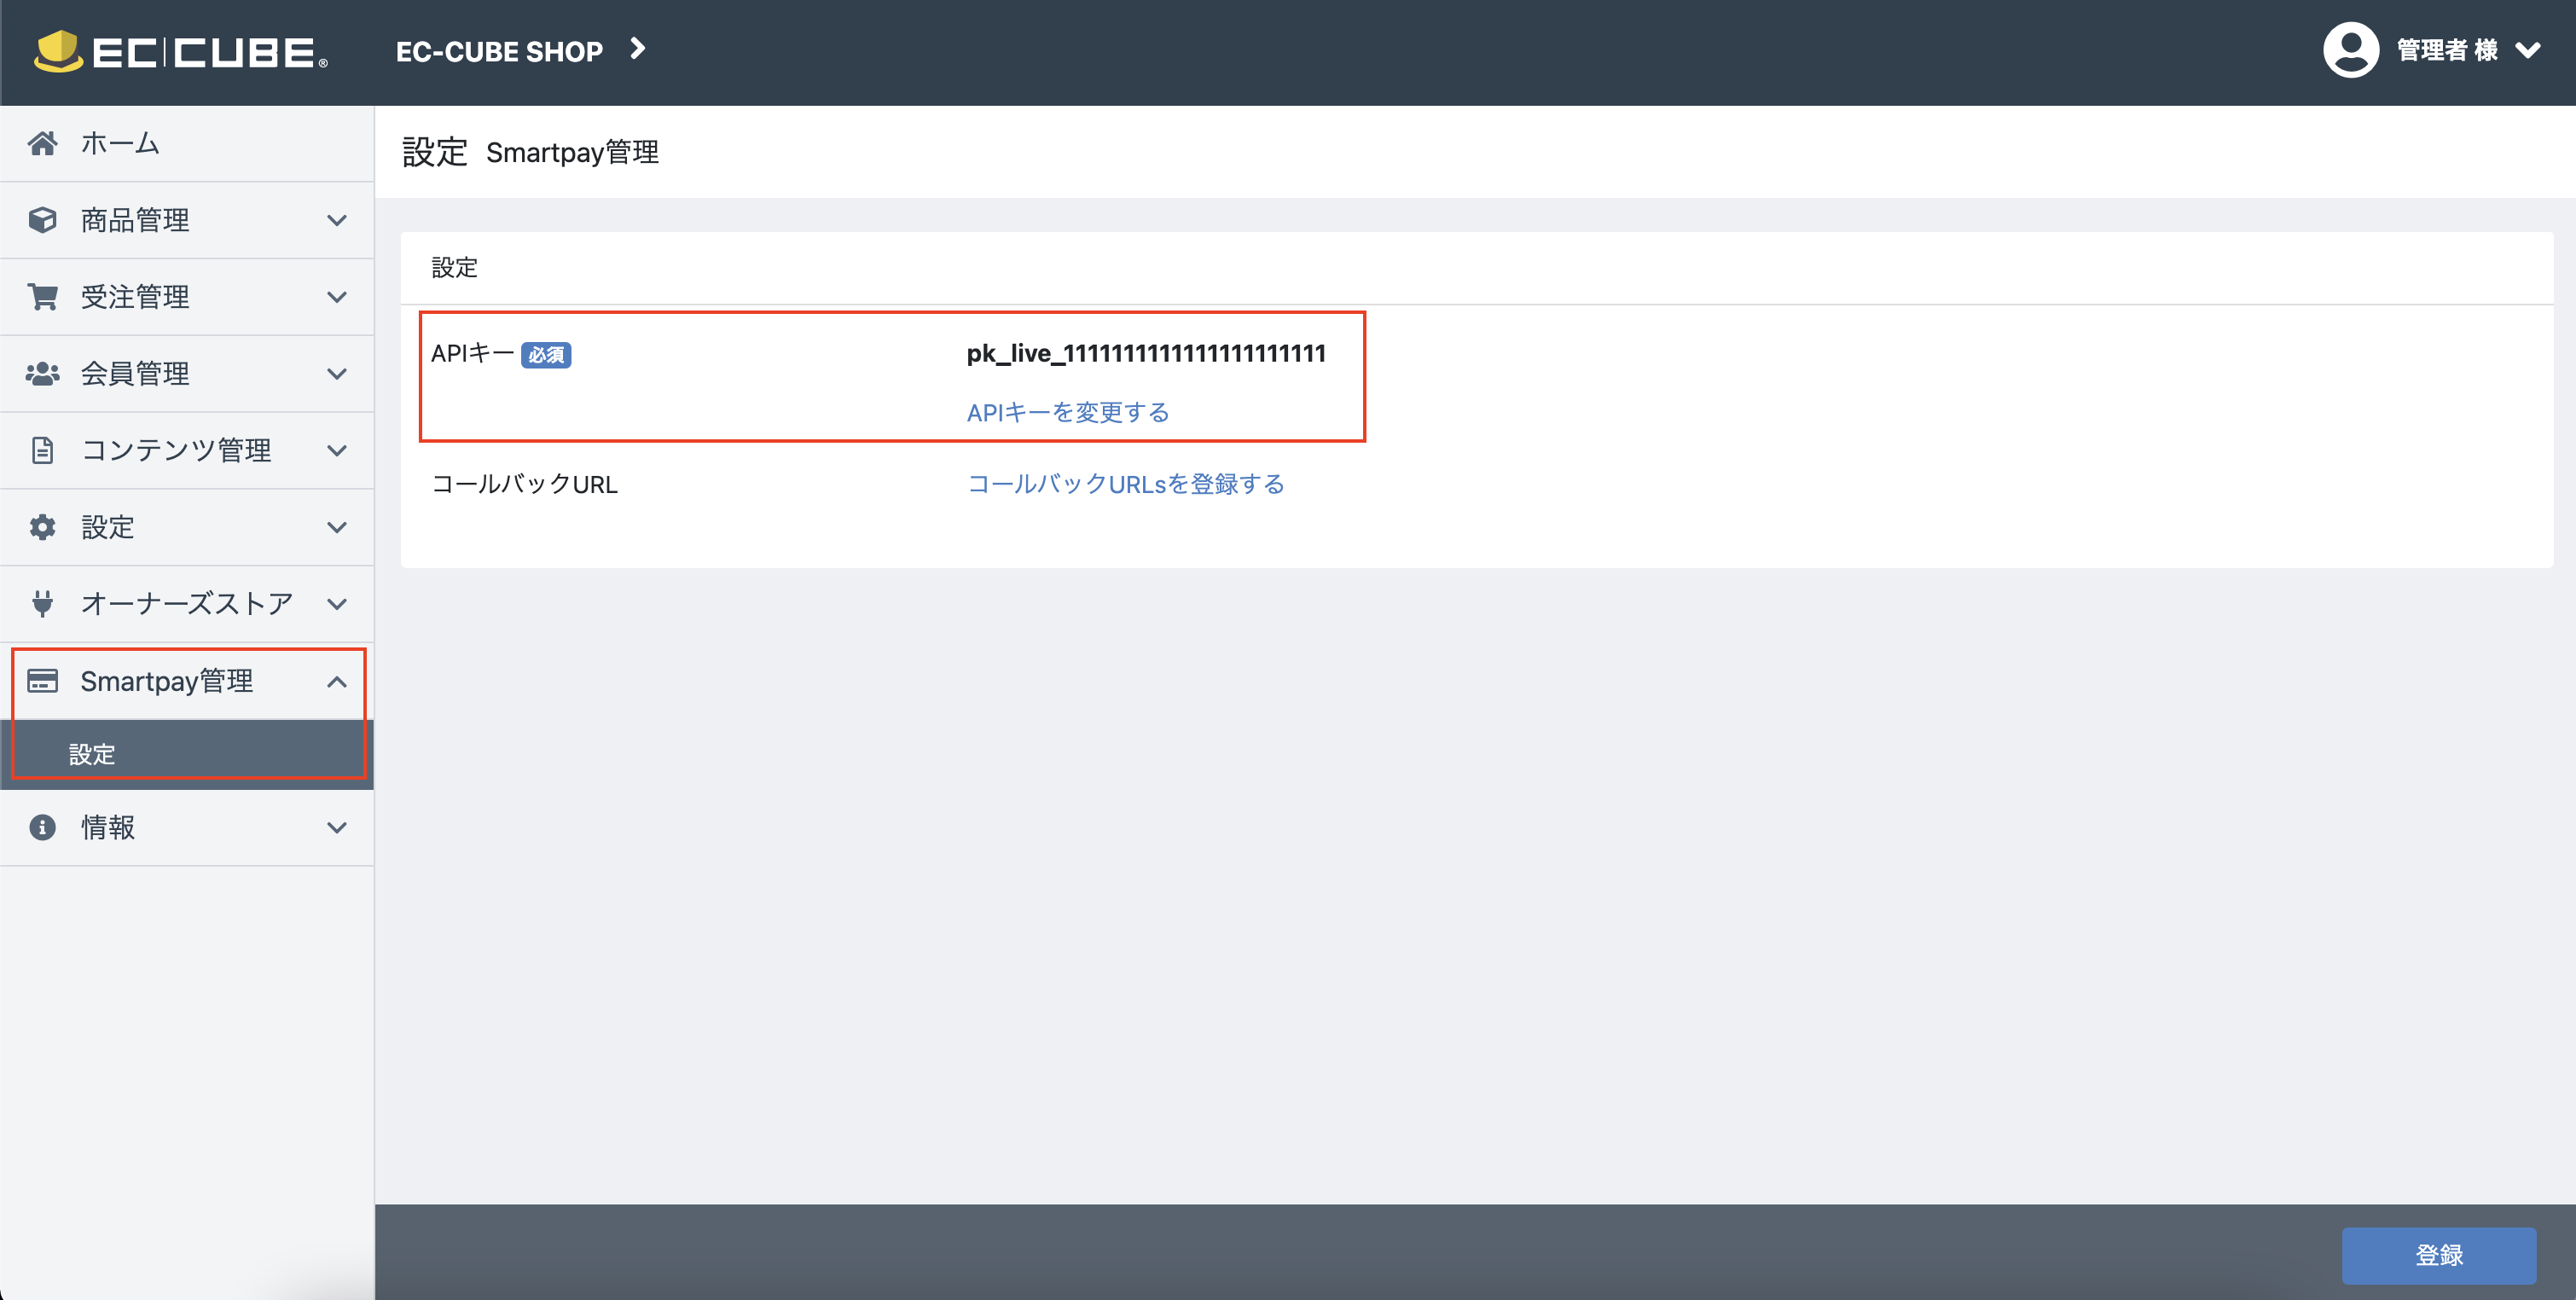
Smartpay管理
Open the Smartpay管理 screen from the left navigation bar
- Fill in your Smartpay API keys. You can find your credentials at the settings > credentials page on your dashboard.
- Specify the callback URLs (optional).
- If you leave them empty a default callback url will be used.
- In case the consumer closes Smartpay checkout without completing the purchase by default they will be redirected back to the cart page so the consumer can select a different payment method
- In case the consumer successfully completes checkout the consumer will be redirected to a confirmation page and the order status will be updated to successful within EC-Cube
- If you would like to specify your own callback URLs please make sure you handle updating the order status correctly within EC-Cube. This is required for the order to show up correctly in your order list on the EC-Cube admin page.
You can find an example code for updating the order status in our plugin here.
- If you leave them empty a default callback url will be used.
Smartpayを有効にする
Smartpayは前の手順ですでに有効になっているはずですが、念のためEC-Cube Adminで次の構成を再確認することが推奨されます。次のいずれかがまだ有効になっていない場合は、有効にしてください。
- On the
設定 > 店舗設定 > 支払方法設定screen confirm thatSmartpay決済payment method is enabled - In the
設定 > 店舗設定 > 配送方法設定settings make sure thatSmartpay決済is enabled for all delivery methods

おめでとうございます!
Smartpayを使用したチェックアウトが可能になりました。ユーザーは、支払い方法で「Smartpay決済」を選択するだけでSmartpayを利用できます。

Smartpayチェックアウトにリダイレクト
Smartpayチェックアウトにリダイレクトされます。
テストする
Smartpayは、スムーズなデベロッパー体験を提供することを目指しています。デベロッパーは、サービスを統合するためのテストアカウントを簡単に作成できます。
テスト時には、テスト用のAPIキーを使用してチェックアウトセッションを作成し、Smartpayチェックアウトを起動してください(APIリクエストの認証に関する詳細は、認証を参照してください)。テストモードでは、カードネットワークや決済プロバイダによって決済が処理されません。これにより、実際に請求されることを心配することなく、安心して統合作業を行うことができます。
テストモードのチェックアウトでは、左上に「テスト中」のバナーが表示されますので、テストモードを使用していることを簡単に確認することができます。

Test mode checkout - login
テスト消費者アカウント
テストモードのチェックアウトを完了するには、テストユーザーアカウントが必要です。以下の手順に従って、Smartpayにテストユーザーとしてサインアップしてください。
メールアドレス
Smartpayのチェックアウトにリダイレクトされたら、あとは+testのサフィックスを持つ任意のメール(例.
[email protected]。登録すると、すぐにテストアカウントとして扱われます。
電話番号
電話番号の入力を求められたら、有効な日本の携帯電話番号を入力してください。
Smartpayは、サインアップ時に指定された電話番号にSMSでワンタイムパスワードを送信することにより、買い物客の電話番号を確認します。ただし、テストアカウントでは、このワンタイムパスワードはSMSで送信されず、フォームにあらかじめ入力されています。
カード番号
Smartpayのテストアカウントには、あらかじめカード番号が設定されているので、さまざまな結果をテストすることができます。
- Success:
4242 4242 4242 4242 - Hard decline:
4100 0000 0000 0019 - Soft decline:
4000 0000 0000 0119
テスト消費者の場合、自分のカードを追加したり、Apple PayやGoogle Payを利用したりすることはできません。

Test mode checkout - pre-configured card numbers
Updated almost 2 years ago