
Salesforce
インストール手順
前提条件
- SFRA バージョンのサポート: 6.0 ~ 6.3
- Node.js: SFRA は v12.21.0 を推奨。nvm.io を使って特定のバージョンの Node をインストールできます。
SFRA ベースの依存関係のセットアップ
-
こちらの手順に従って SFRA base repository をダウンロードします。
-
SFRA ベースパッケージを
../storefront-reference-architecture-masterに解凍し、package.jsonに定義されているベースパスと一致させます。
コンパイル
-
SFRA のベースパスで
npm install; npm run compile:js; npm run compile:scssを実行します。 -
Smartpay のカートリッジパスで
npm install; npm run compile:js; npm run compile:scssを実行します。
アップロード
お好きなツールを使ってコンパイルしたカートリッジを SFCC サーバーにアップロードします。
以下は、VS Code 及び Prophet Debugger Extension を使ったカートリッジのアップロード手順の例です。
-
VS Code を開き、マーケットプレイスから Prophet Debugger をインストールします。
-
ご自身のプロジェクトの
.vscodeフォルダでファイルを作成します。サンドボックスのクレデンシャル情報と設定を入力します。.vscode/launch.json{ "version": "0.2.0", "configurations": [ { "type": "prophet", "request": "launch", "name": "Attach to Sandbox" } ] }.vscode/dw.json -
Prophet: Clean project/Upload Allを実行し、カートリッジをアップロードします。
Business Manager の設定
Smartpay の連携を機能させるには、Business Manager で以下の設定を行う必要があります。
Business Manager でカートリッジをアクティブにする
Smartpay を利用できる状態にするには、以下の手順に従ってサイトのカートリッジパスにカートリッジを追加する必要があります。
- Business Manager にログインします。
Administration > Sites > Manage Sitesの順に移動します。- サイト名をクリックし、次のページで
Settingsタブを選択します。 Cartridges入力フィールドでベースカートリッジパスの前にint_smartpay_sfra: int_smartpay_coreを追加します。Applyボタンをクリックします。- Sandbox/Development/Production インスタンス用のカートリッジをアクティブにするには、
Instance Typeのドロップダウンメニューから適切なインスタンスを選択し、手順4と5を繰り返します。 - Smartpay を導入する各サイトに対して手順3〜6を繰り返します。
Manage the Business Manager siteに移動します。Cartridges入力フィールドでbm_smartpay:bc_smartpay:int_smartpay_coreを追加します。Applyボタンをクリックします。
カートリッジモジュールを有効にする
カートリッジモジュールを有効にするには、
Administration > Organization > Roles & Permissionsの順に移動します。Administratorをクリックし、Business Manager Modulesタブをクリックします。- Select Context ダイアログボックスで、サイト ID のチェックボックスをオンにし、
Applyボタンをクリックします。 - Smartpay を見つけ、チェックボックスをオンにして有効にします。
Updateボタンをクリックします。
メタデータのインポート
Smartpay の連携を機能させるためには、以下のオブジェクト構造(メタデータ)を Business Manager にインポートし、設定する必要があります。
- カートリッジバンドルで、
metadata/ smartpay-meta-import/sites/RefArchフォルダを見つけます。
RefArchフォルダの名前をご自身のサイトの ID に変更します。メタデータをインポートするサイトが複数ある場合は、RefArchフォルダをコピー&ペーストし、他のサイト用に複製します。フォルダ名をそれぞれ対応するサイトの ID に変更します。jobs.xmlファイルのcontext site-idの値をご自身のサイト ID に変更します。- カートリッジバンドルの
metadataフォルダに、smartpay-meta-import フォルダを圧縮し、smartpay-meta-import.zipファイルを生成します。 Business Manager Menu > Administration > Site Development > Site Import & Exportの順に移動します。Import > Upload Archiveで、Localオプションボタンが有効になっていることを確認します。- Choose File 入力フィールドをクリックし、先ほど作成した
smartpay-meta-import.zipを選択し、uploadボタンをクリックします。 - アップロードが終わったら、アーカイブリストから
smartpay-meta-import.zipのオプションボタンをクリックし、Importボタンをクリックします。 - 確認ボックスで 、”Are you sure that you want to import the selected archive? (選択したアーカイブを本当にインポートしますか?)” と聞かれたら、
OKボタンをクリックします。
メタデータのインポートに成功すると、以下の属性が作成されます。
カスタムサイト設定
Business Manager で、Merchant Tools > Site Preferences > Custom Preferences の順に移動します。Smartpay Settings という ID のカスタムサイト設定グループが表示されます。
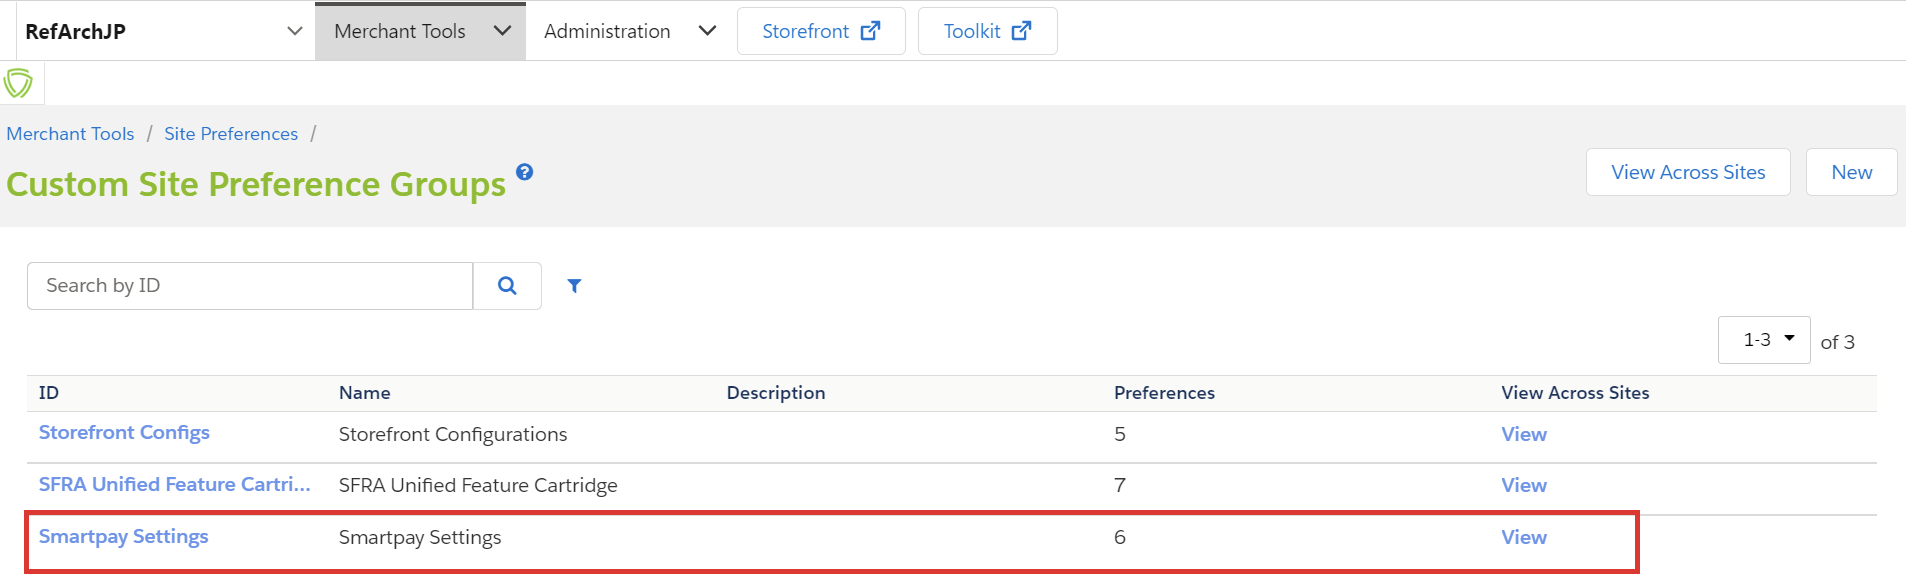
それを選択し、ご自身の Smartpay アカウントのデータに基づき属性を編集してください。
サイトごとにプリファレンスの値を設定します。
- Is Smartpay Enabled (ID:isSmartpayEnabled、種類:ブール値):シングルポイントで Smartpay とその機能を有効
または無効にします。 - Api Secret (ID:smartpayApiSecret、種類:文字列):Smartpay の API 秘密キー
- Payment Mode (ID: smartpayCaptureMethod、種類:文字列の列挙):取引の種類を選択します。
- Minimum Checkout Value (ID:smartpayMinPrice、種類:文字列):Smartpay を選択するための注文最低金額を設定します。
- Maximum Checkout Value (ID: smartpayMaxPrice、種類: 文字列):Smartpay を選択するための注文最高金額を設定します。
- Orders Created Time(ID:smartpayOrdersCreatedTime、種類:文字列):該当する時間の注文を見つけます。時間は分数で設定します。
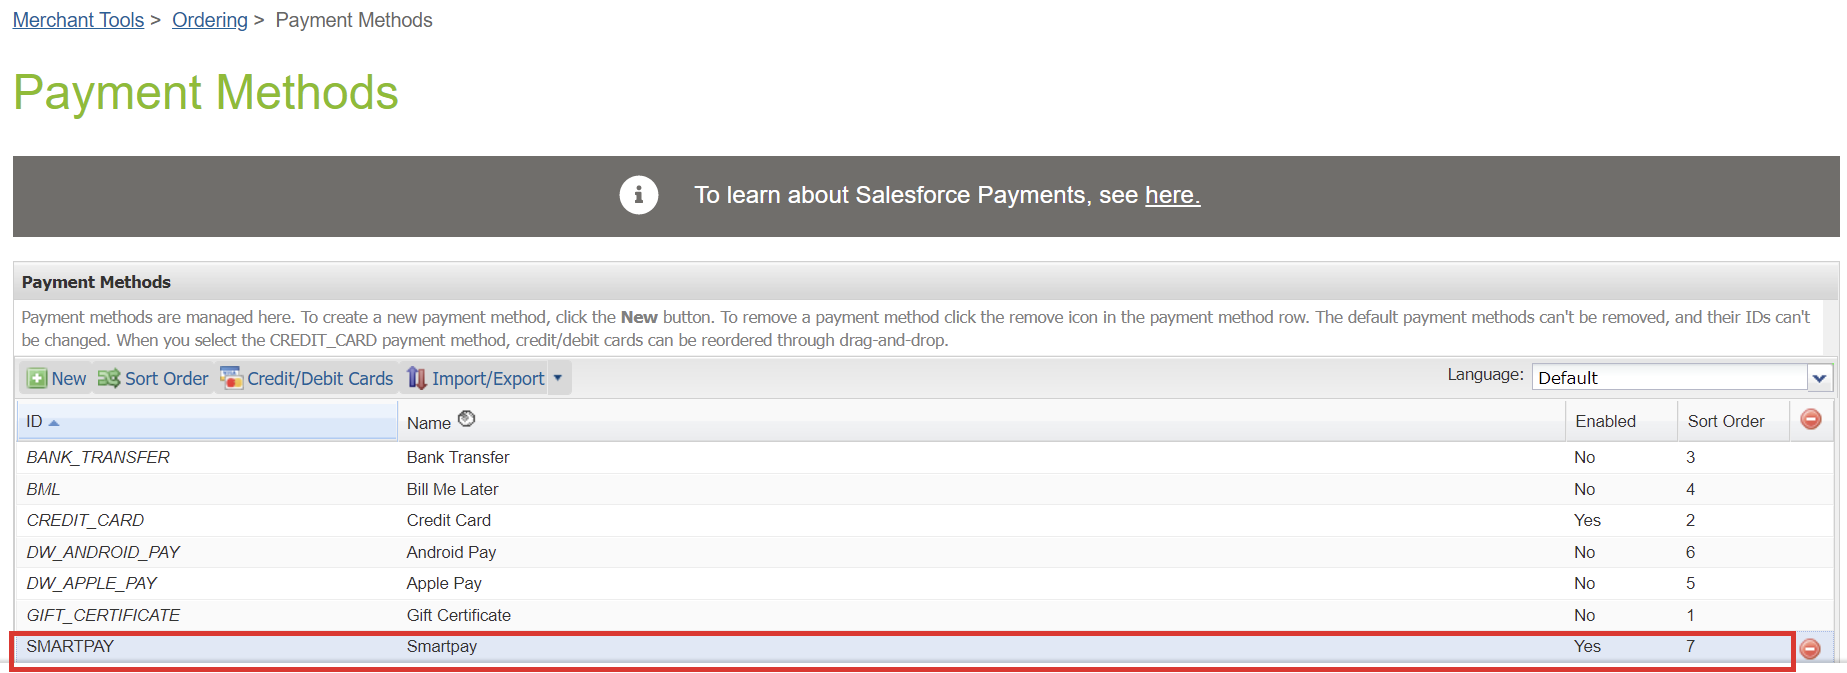
支払い方法
Merchant Tools > Ordering > Payment Methods に、「SMARTPAY」という ID の支払い方法が作成されていることを確認します。
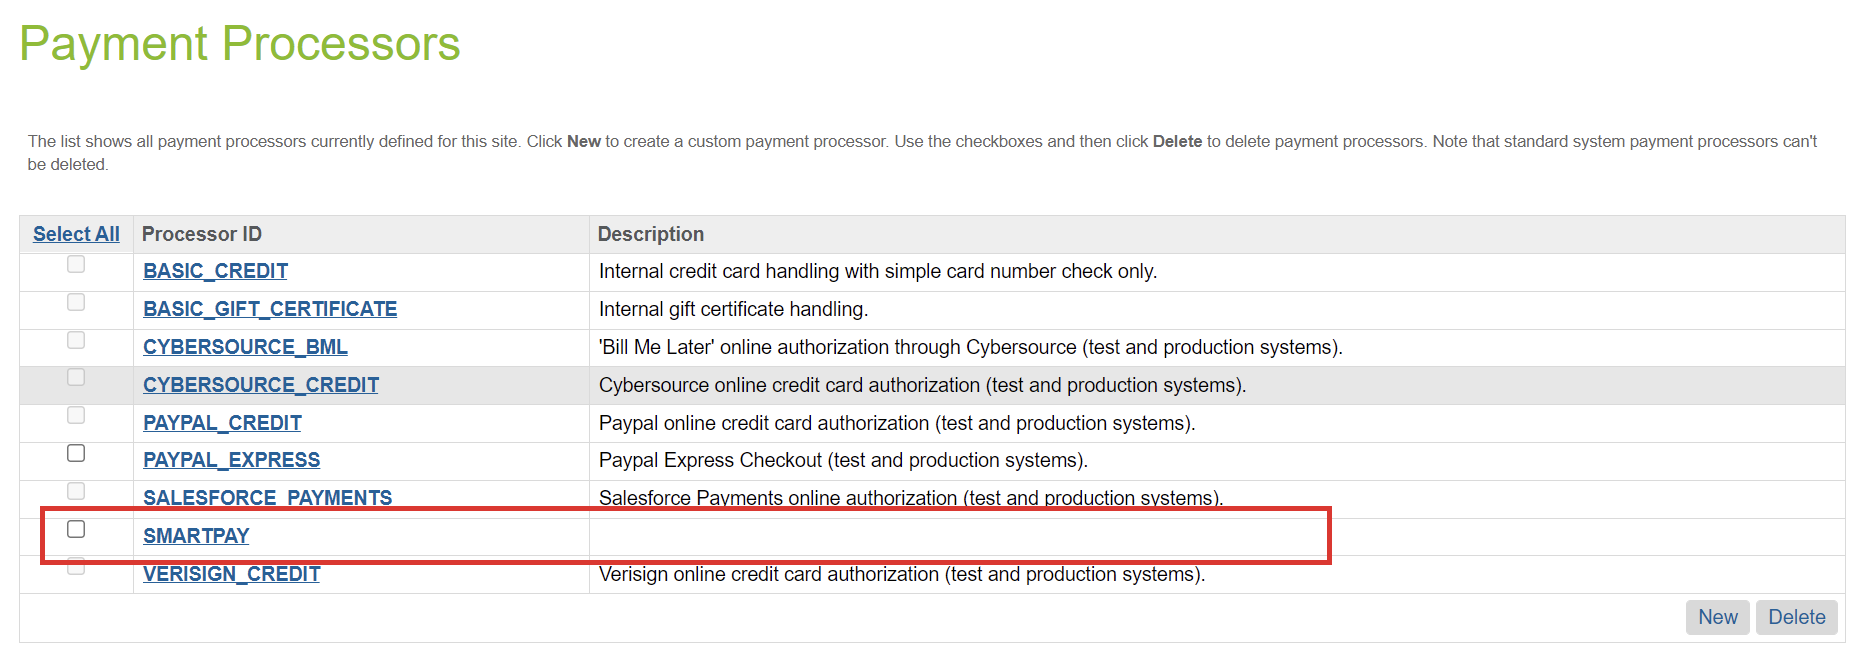
支払いプロセッサー
Merchant Tools > Ordering > Payment Processors に、「SMARTPAY」という ID の支払いプロセッサーが作成されていることを確認します。
HTTP サービス
Administration > Operations > Services に、「smartpay.http.generic」という ID のサービスが作成されていることを確認します。

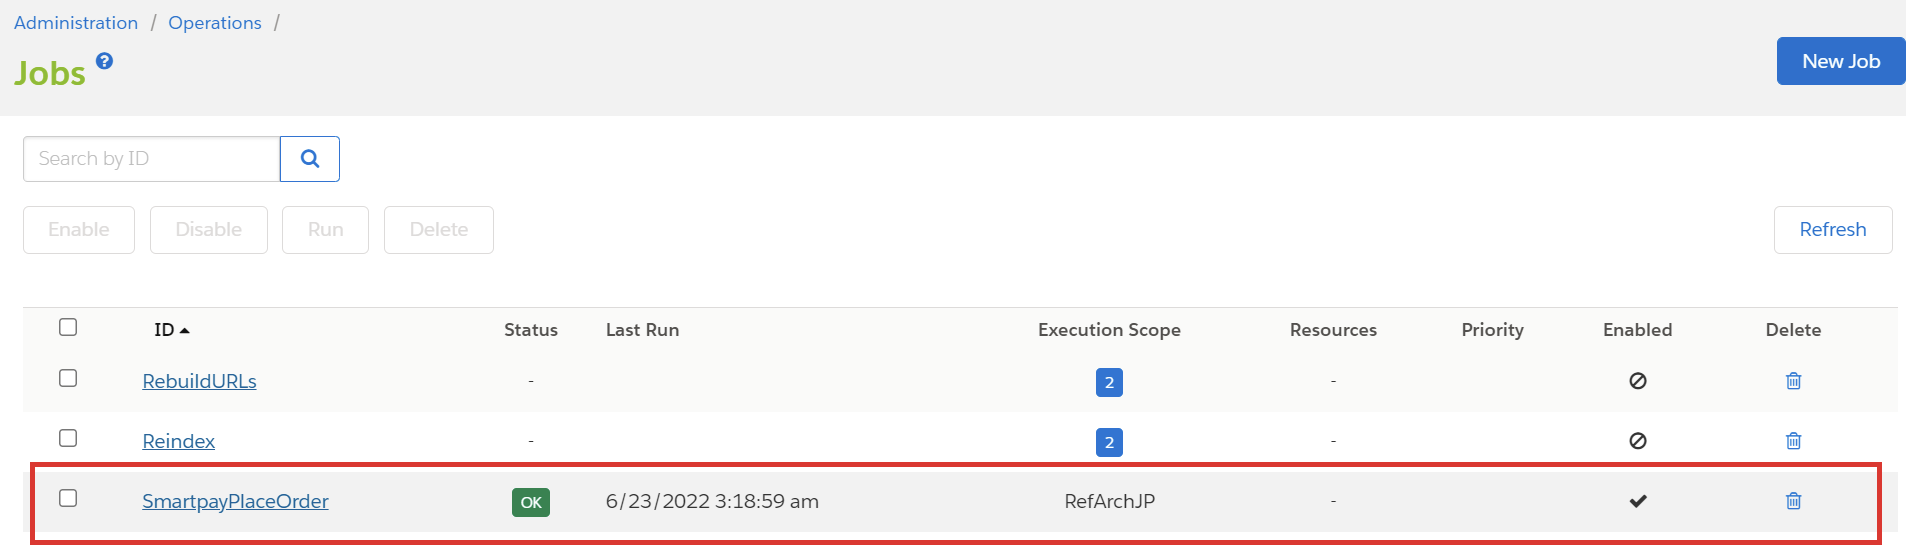
ジョブ
Administration > Operations > Jobs に、「SmartpayPlaceOrder」という ID のジョブが作成されていることを確認します。
Updated almost 2 years ago